Managing ArNS names using arns.app
Arns.app
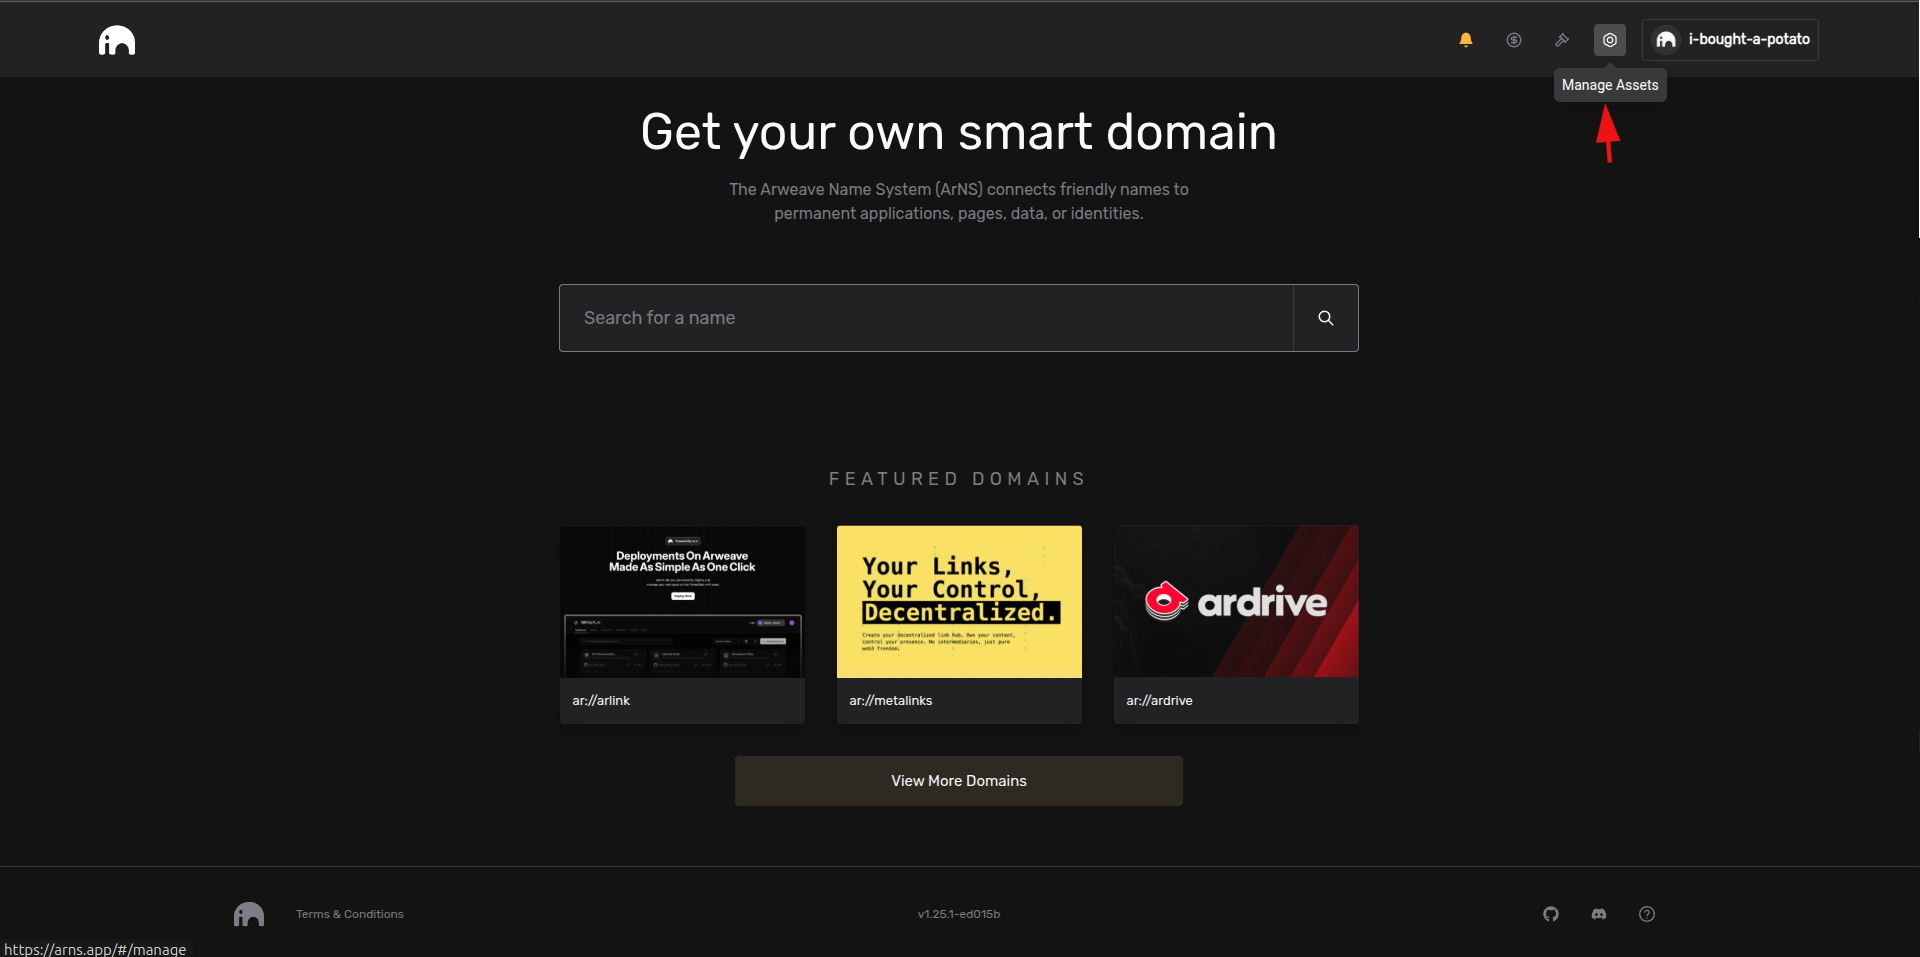
The simplest way to register or manage an ArNS name is by using the user interface maintained by the ar.io team at arns.app. This site can also be accessed as an ArNS name itself on any ar.io gateway via ar://arns.
Visit arns.app in your browser and connect your wallet using the "Connect" button at the top right of the screen.

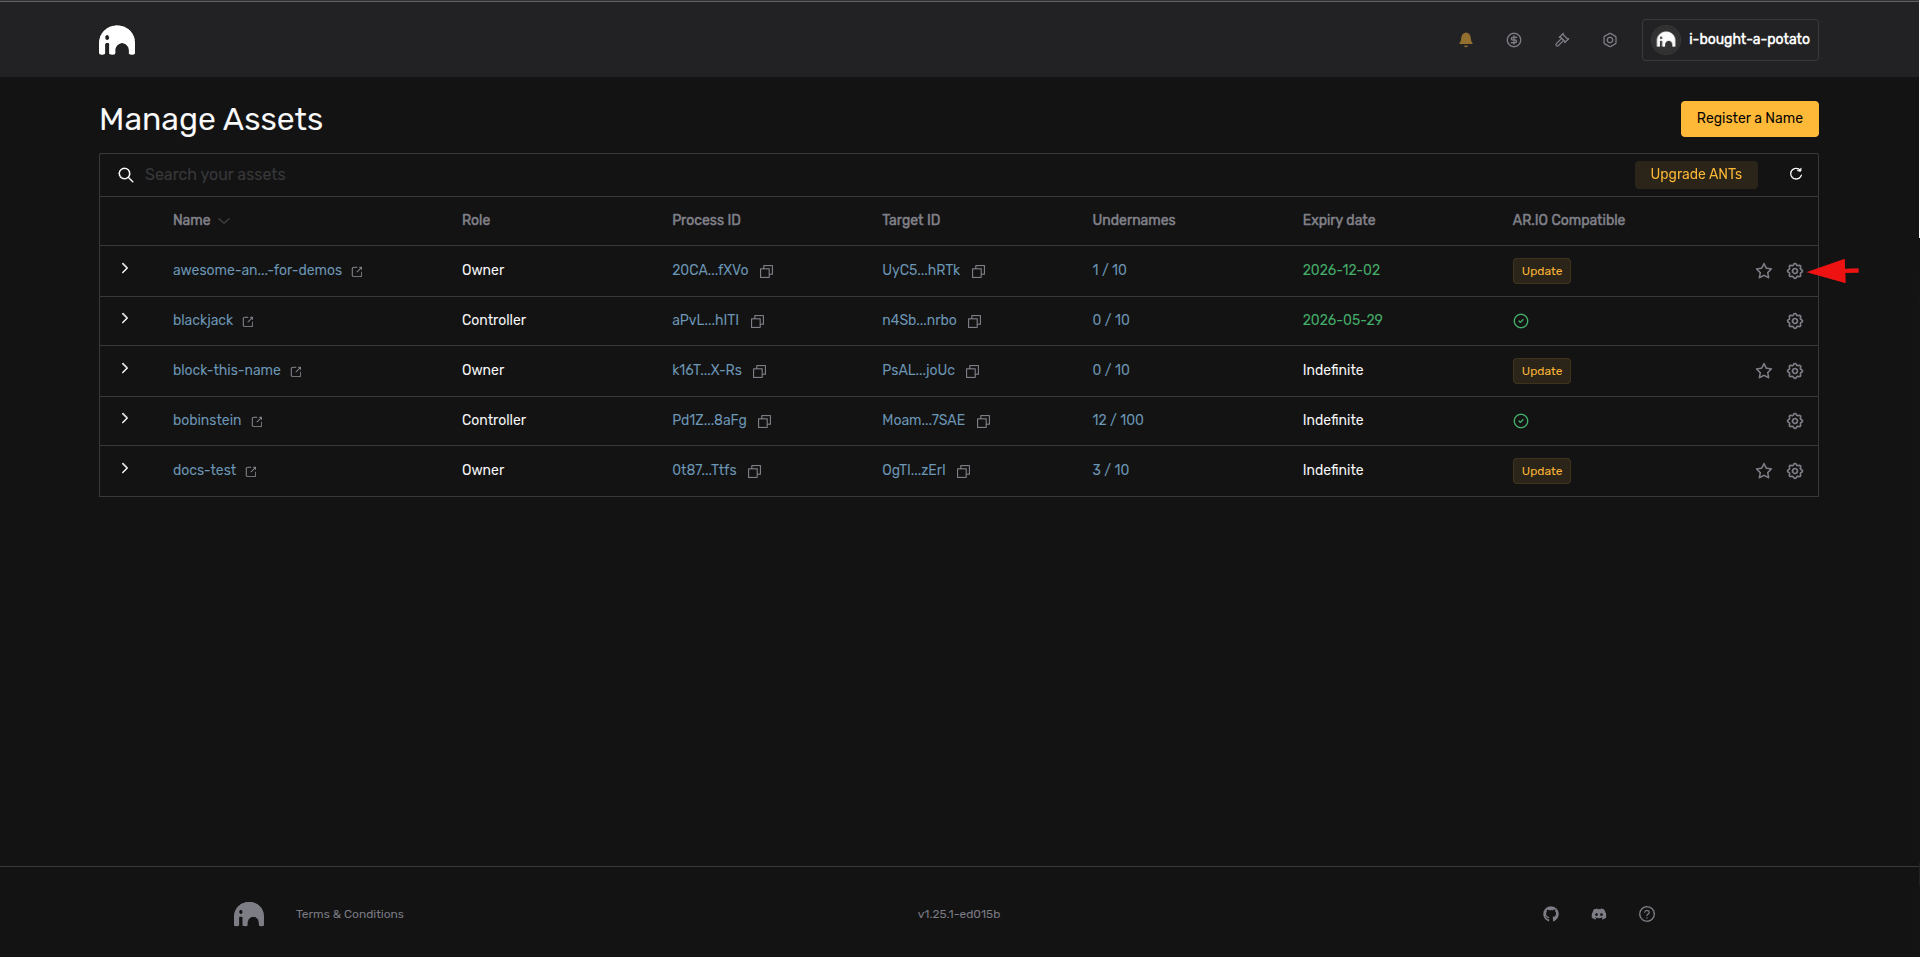
Use the "Manage Assets" button at the top right of the screen to view and manage your registered ArNS names.
The "Manage Assets" page will display a list of your registered ArNS names. You can click on an ArNS name to view the details of the name, or click the "gear" icon to the right of the name to view the settings for the name.
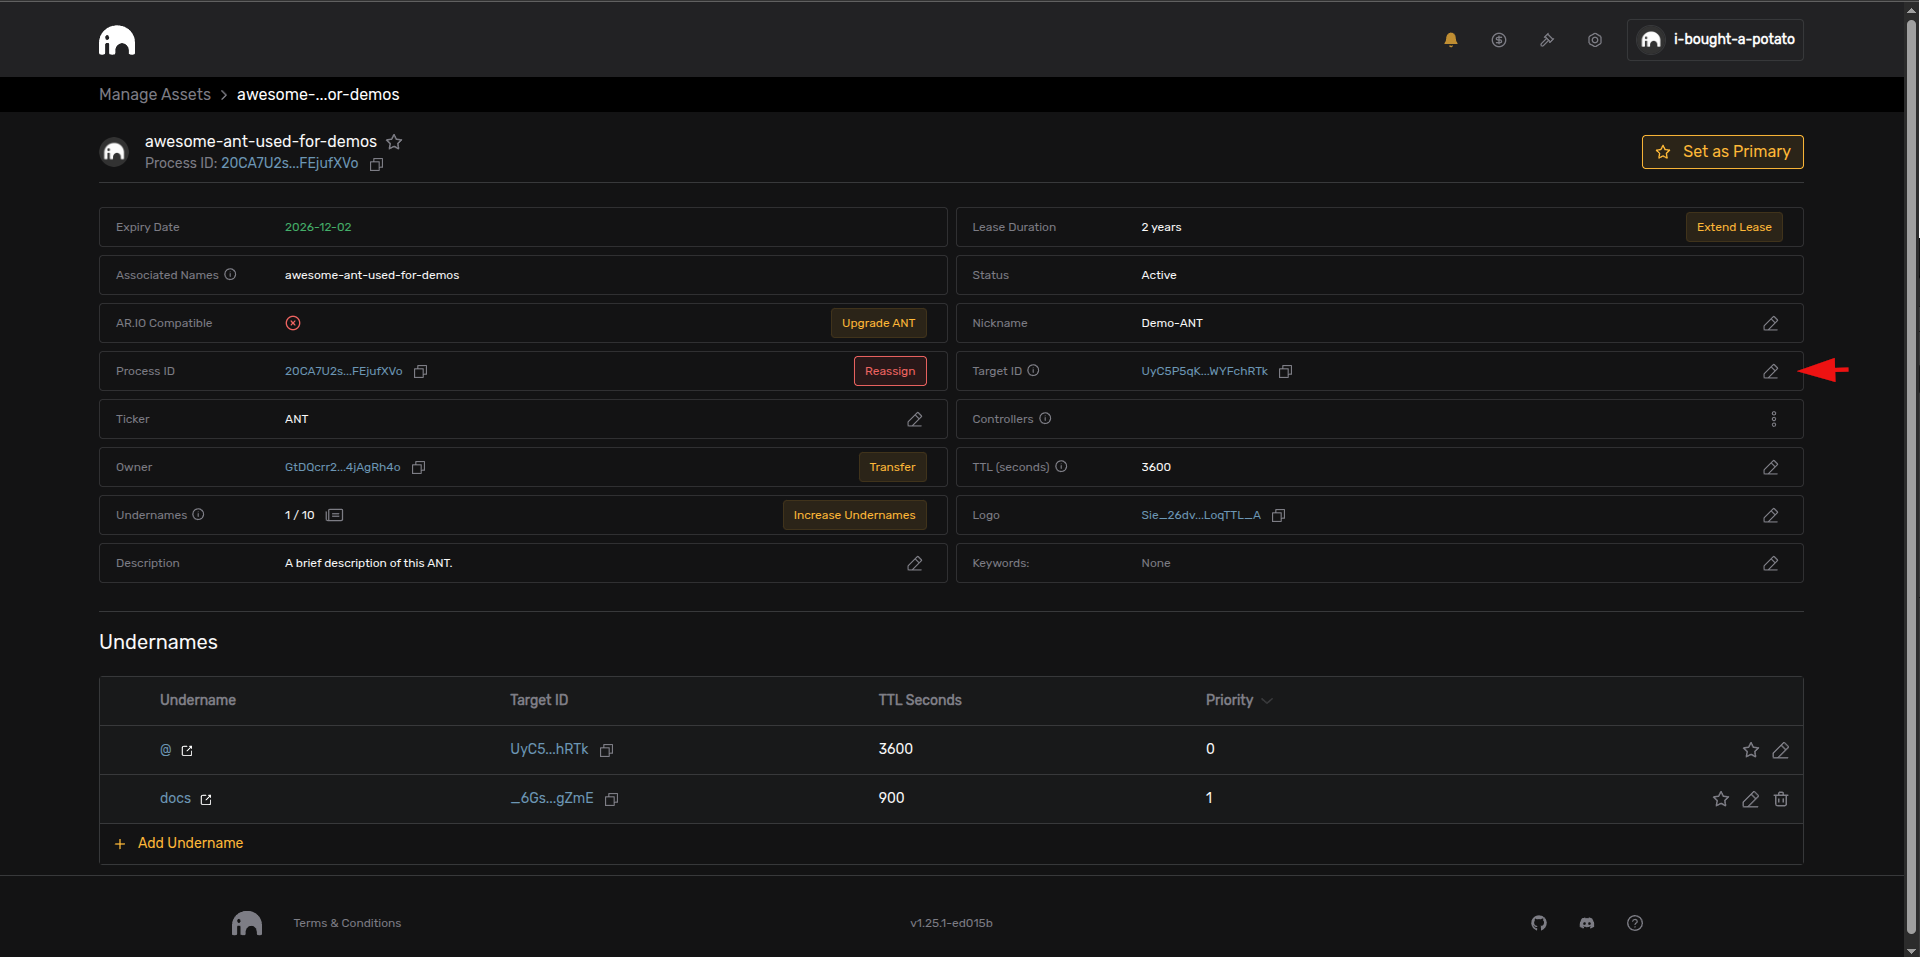
The "Settings" page will display the settings for the selected ArNS name. You can transfer the name to a different wallet, add or remove controllers, set info about the name like the description, keywords, and logo, extend the lease duration, and more from this page.
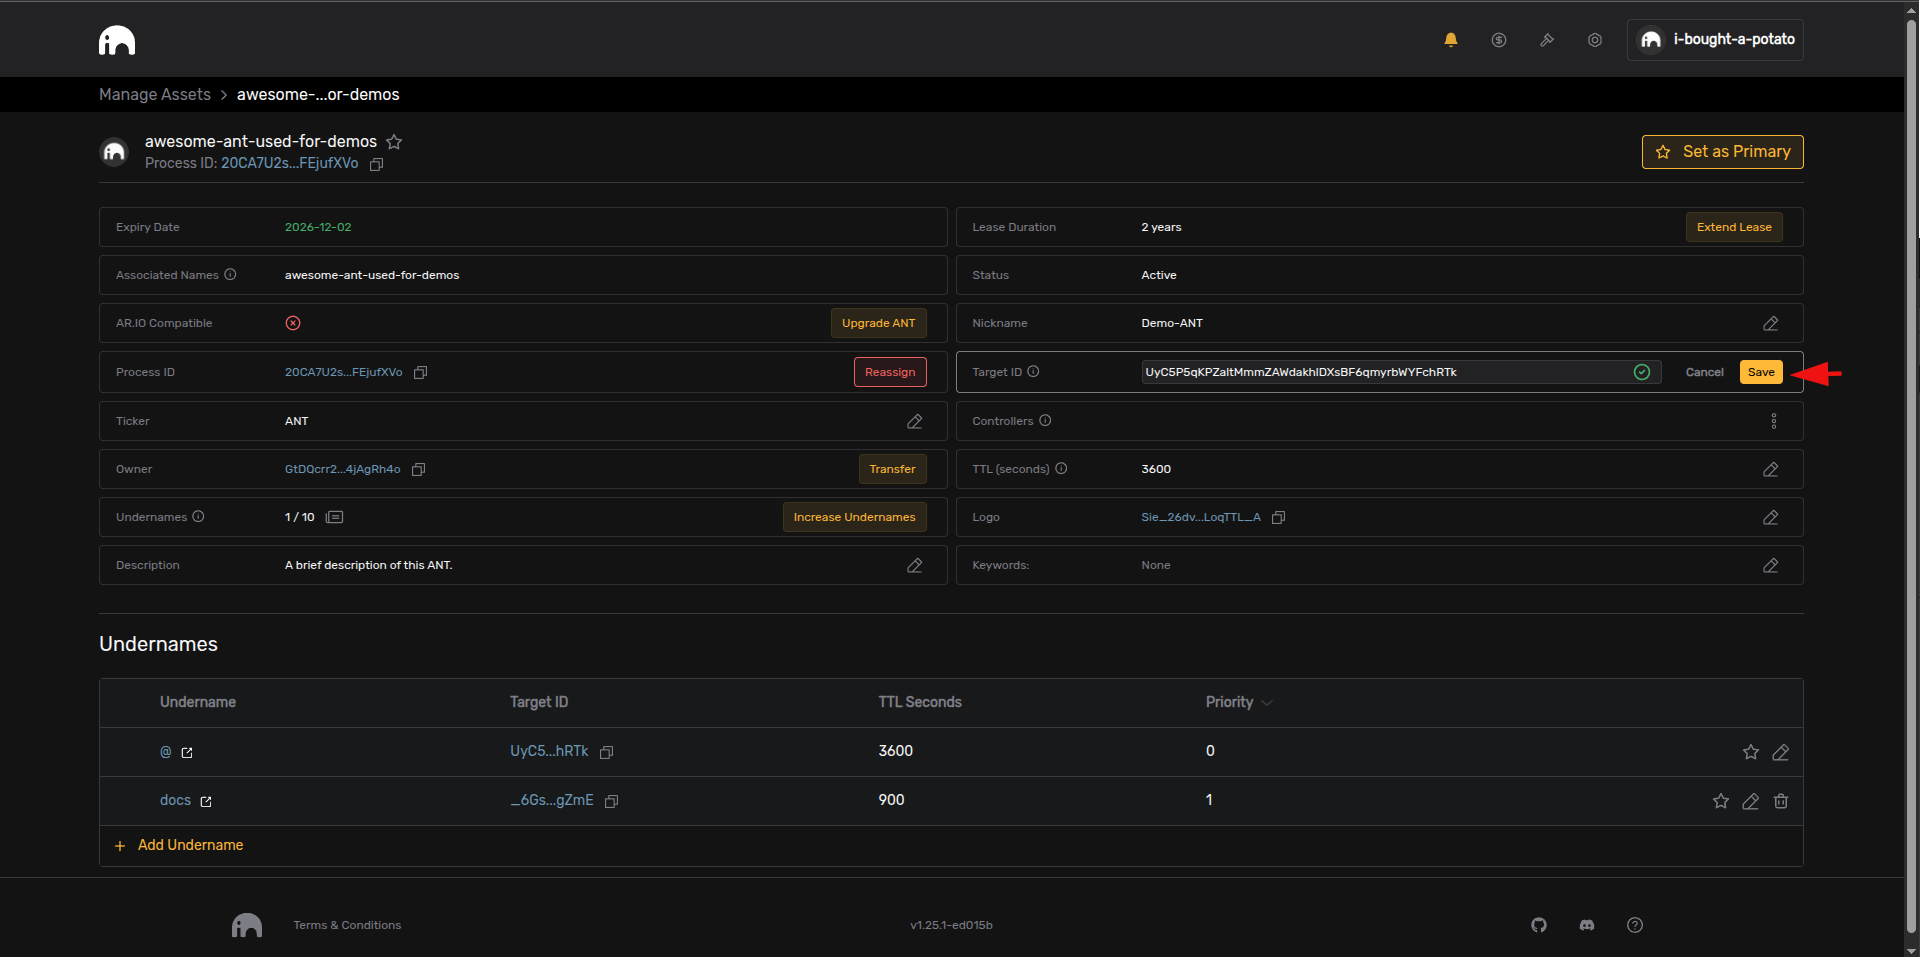
The most common setting you will want to change is the data that the name is pointing to. You can change this by using the "Target ID" field.
Once you have copied in a new Arweave transaction ID to the "Target ID" field, you can click the "Save" button to save and deploy the changes.
Any updates to the ArNS name will require a signature from the wallet that owns the name, or an authorized controller.
Next Steps
Register Programmatically
Use the ar.io SDK to programmatically register ArNS names.
Set Records Programmatically
Use the ar.io SDK to programmatically manage ArNS records.
Primary Names
Set up web3 identity with primary names.
How is this guide?