Purchasing an ArNS name using arns.app
Arns.app
The simplest way to register or manage an ArNS name is by using the user interface maintained by the ar.io team at arns.app. This site can also be accessed as an ArNS name itself on any ar.io gateway via ar://arns.
Visit arns.app in your browser and connect your wallet using the "Connect" button at the top right of the screen.

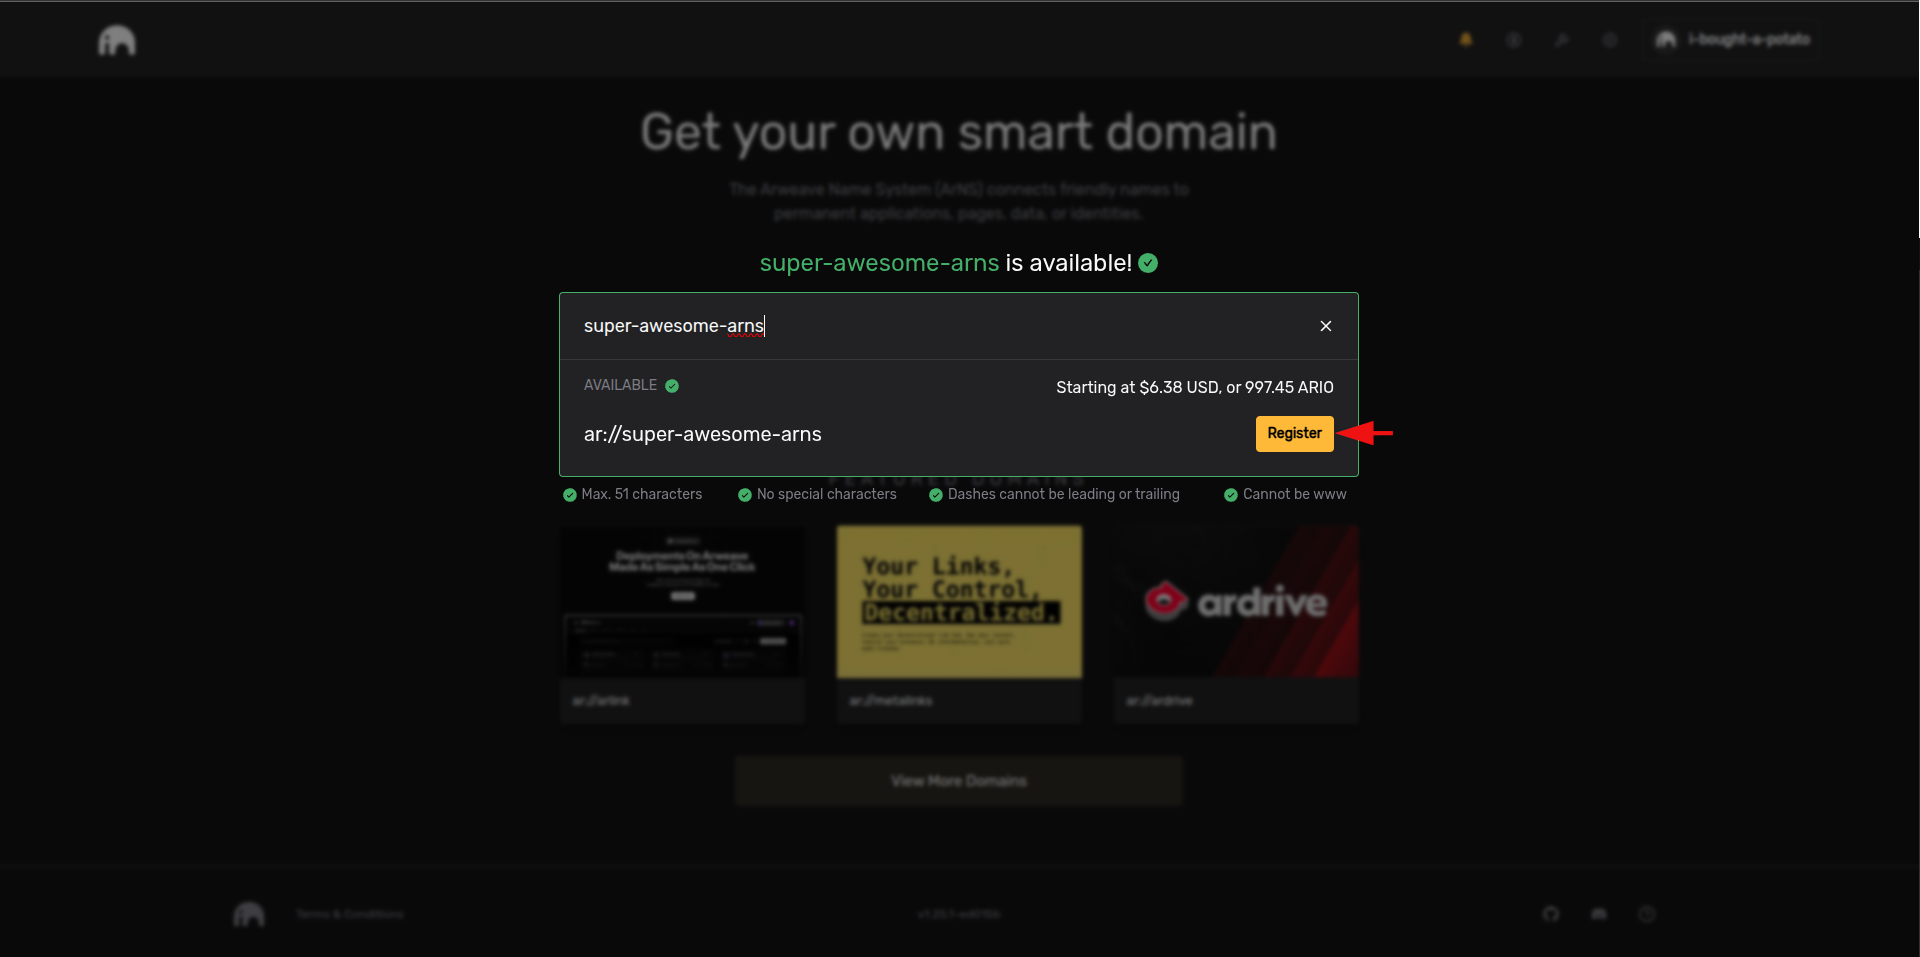
Search for an ArNS name in the search bar in the center of the screen to see if your chosen name is available. If it is, click the "Register" button to register it.
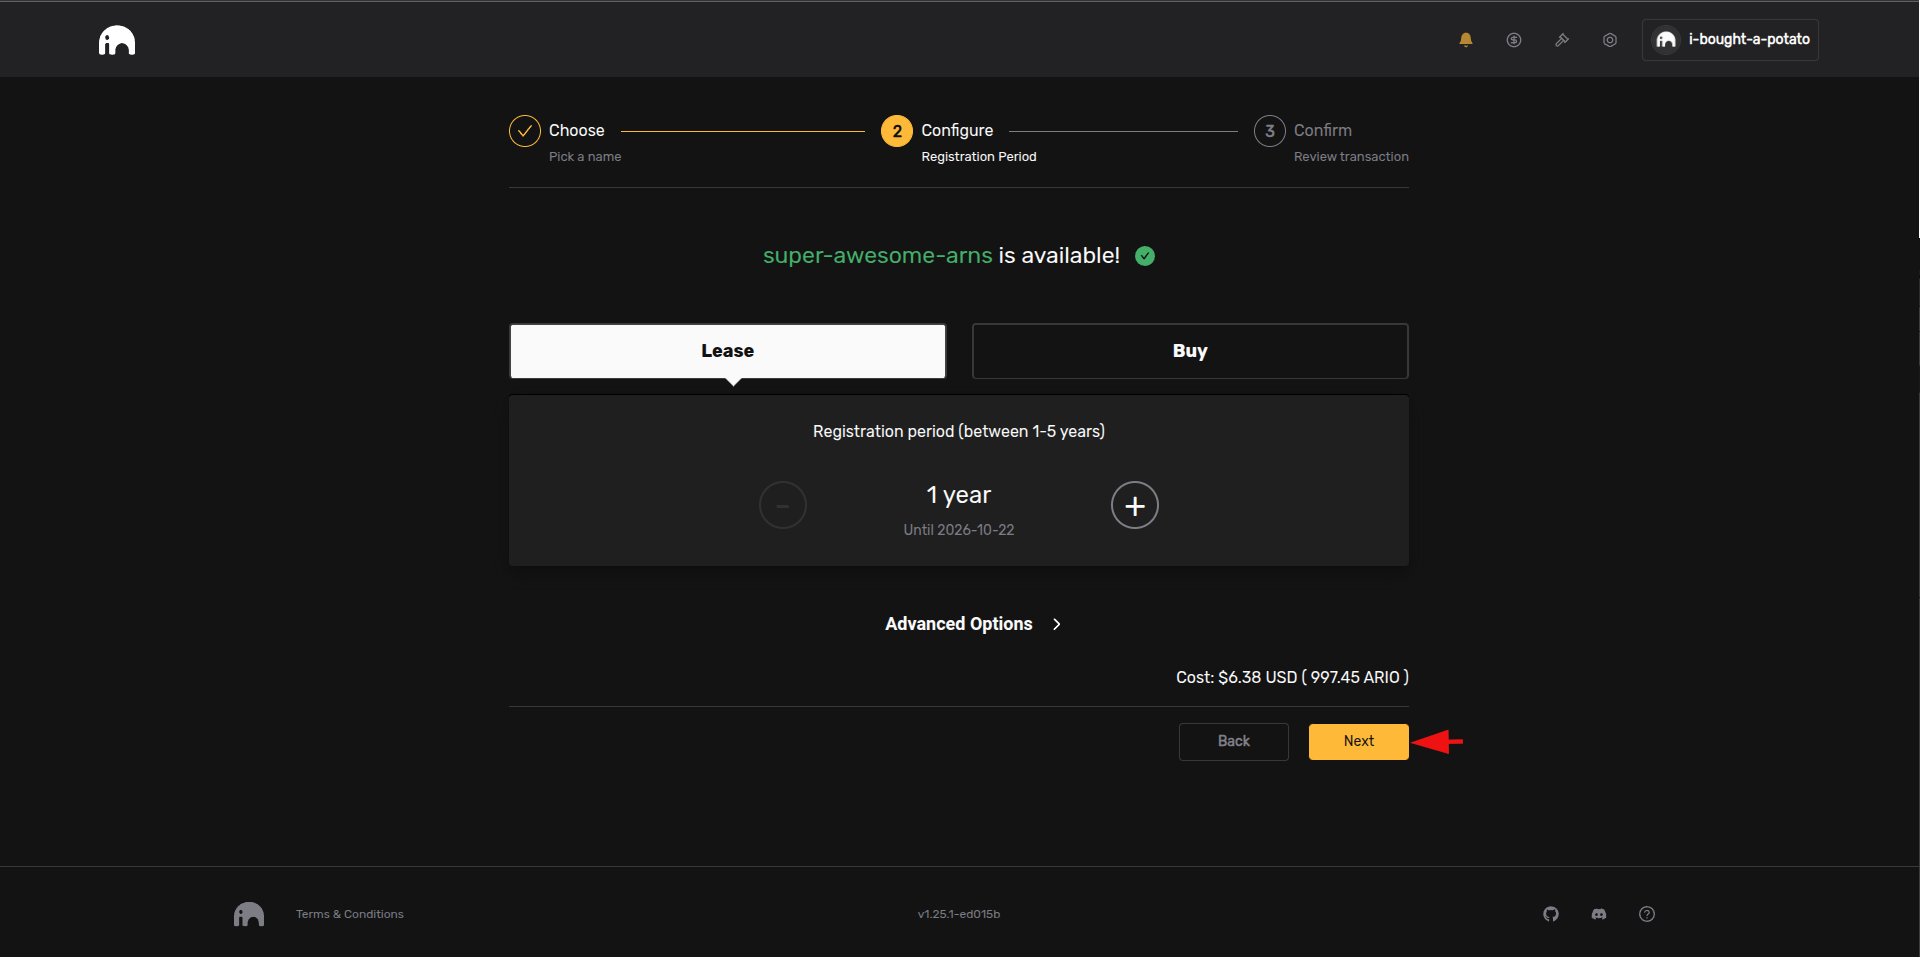
On the registration page, you will be able to configure the lease duration for registering the name, or choose to permabuy the name. The displayed price for the registration will automatically recalculate based on the selected purchase type and lease duration.
Once you are satisfied with the configuration, click the "Next" button to proceed to the payment page.
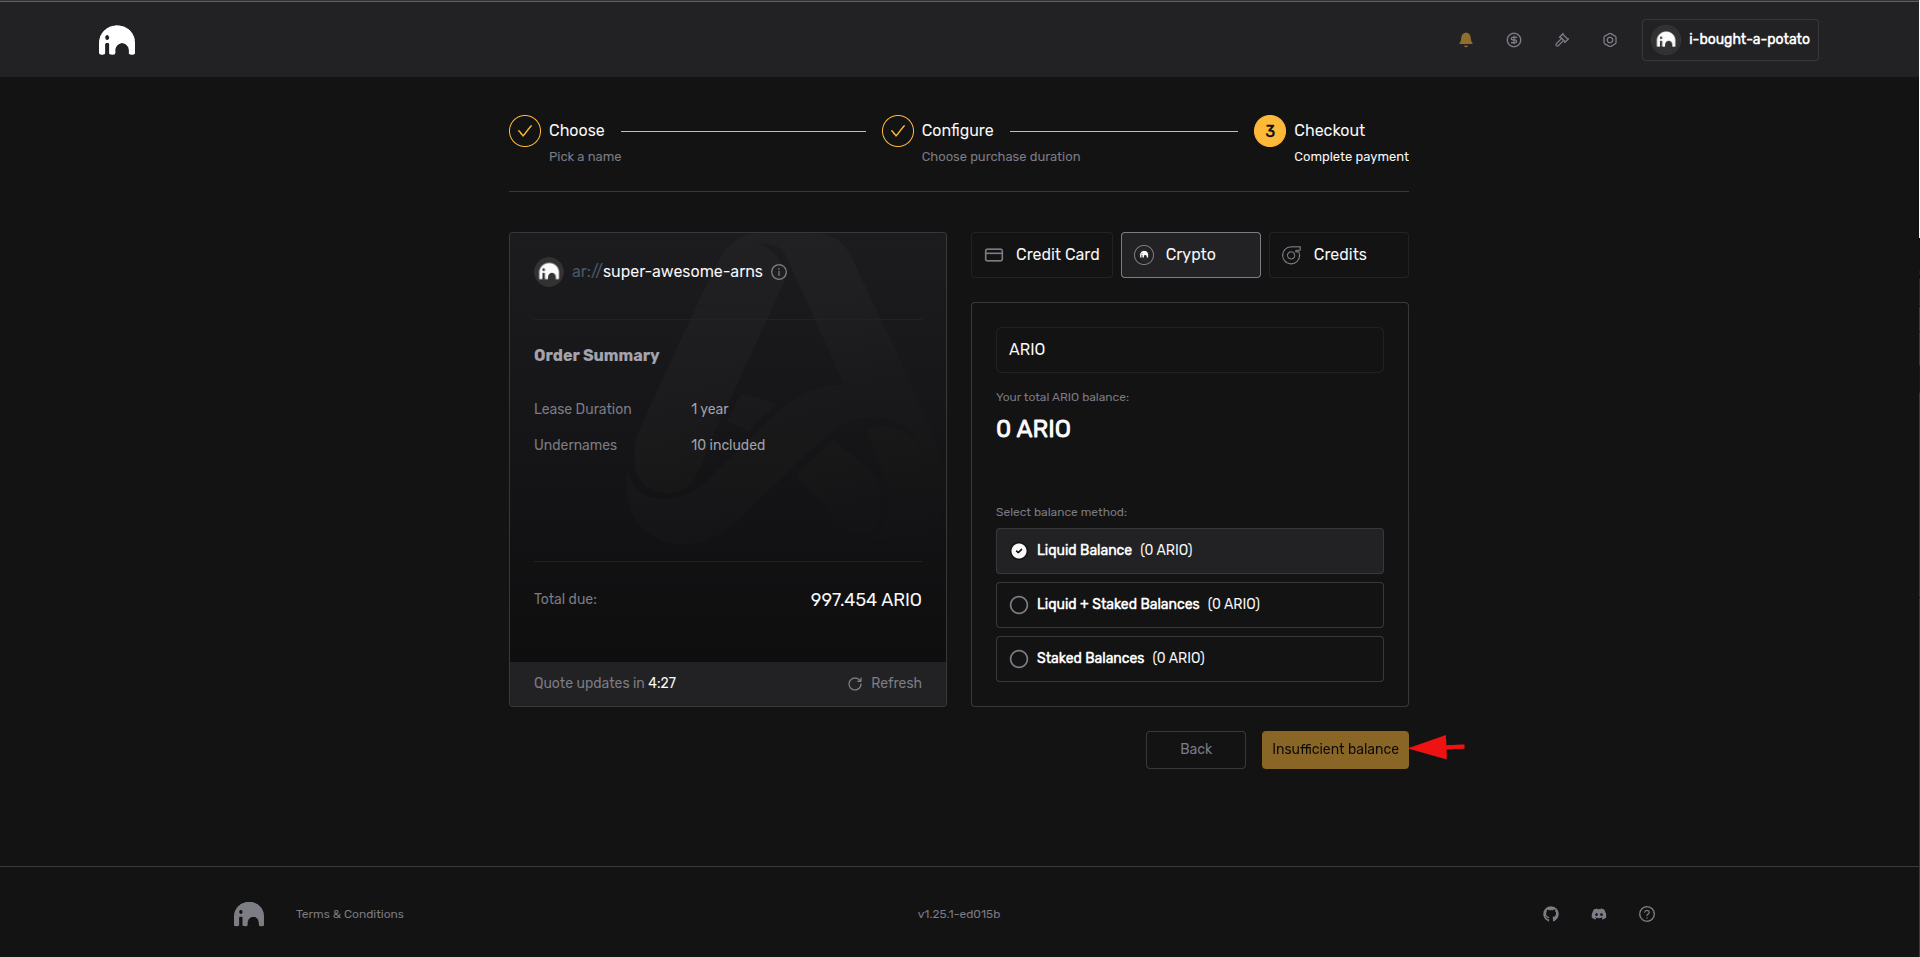
On the payment page, you will be able to review the details of the registration and the price you will be charged. You will also be able to select the payment method between a credit card, ARIO tokens, or Turbo Credits.
If you do not have enough ARIO tokens or Turbo Credis for your chosen registration configuration, the payment button will display "Insufficient Balance" and you will not be able to proceed using that payment method.
Once you are satisfied with the configuration, click the "Pay Now" button to complete the registration and celebrate your new ArNS name!
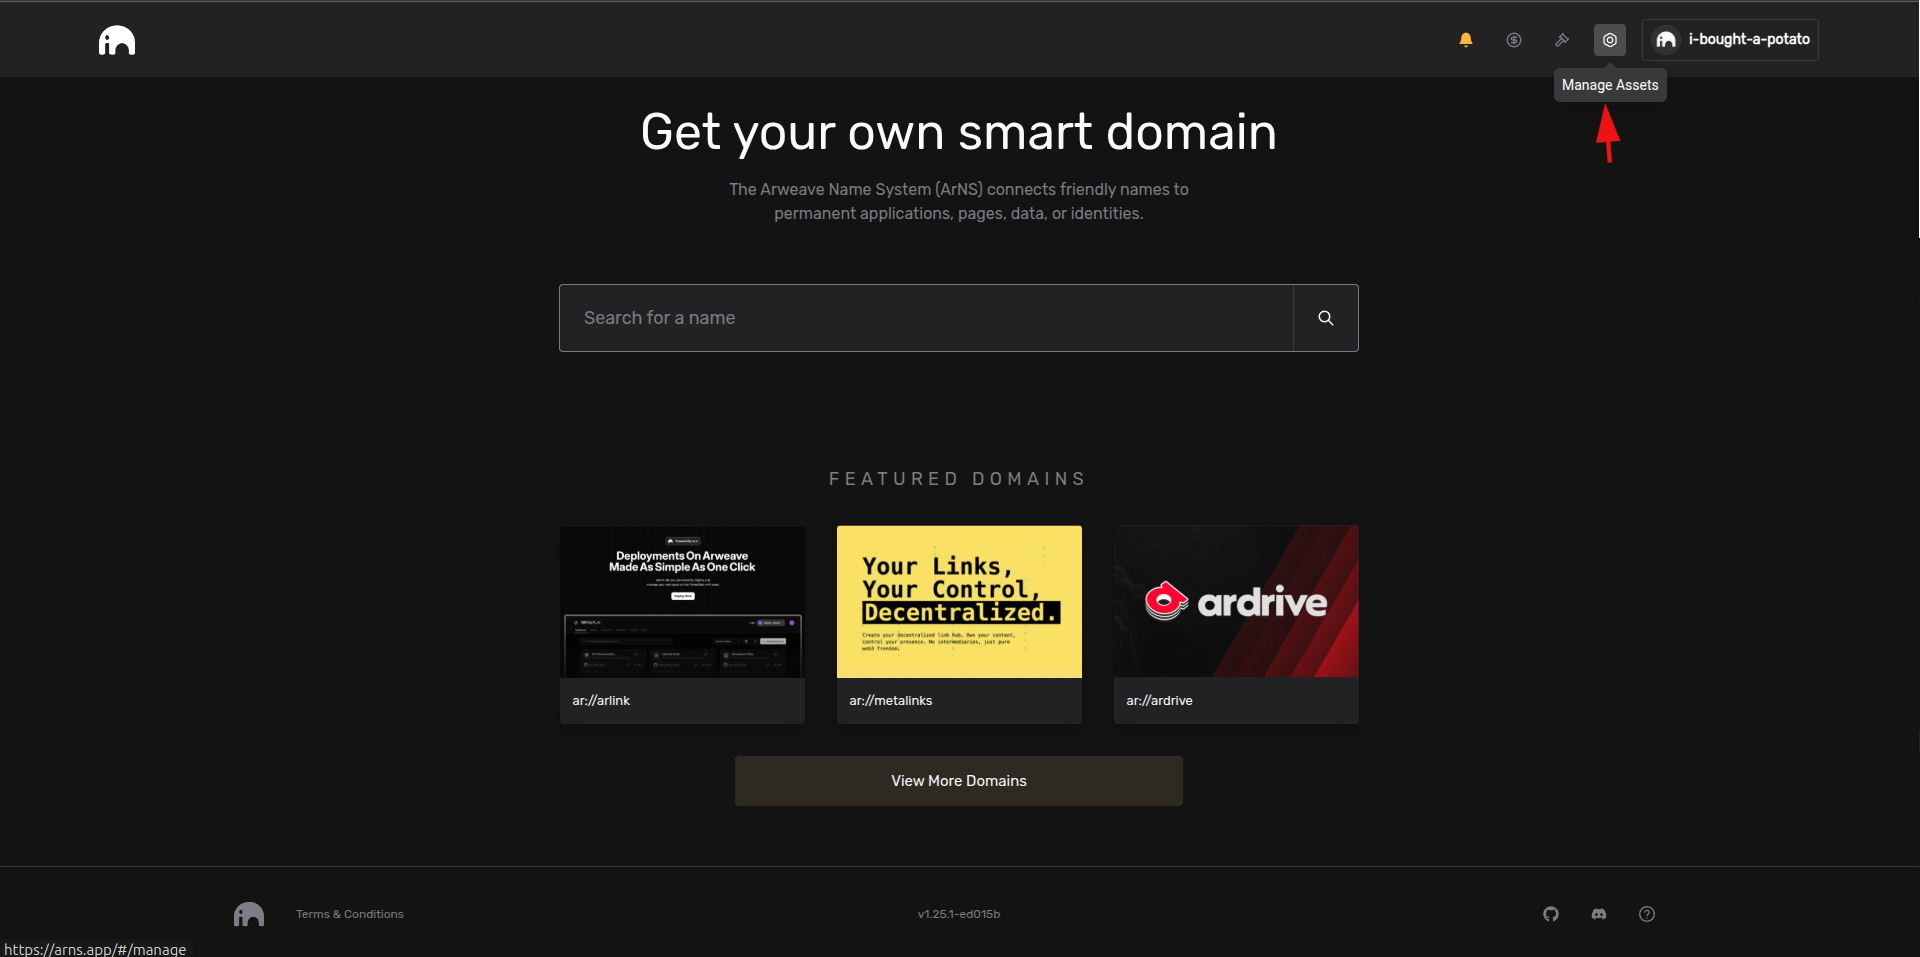
Use the "Manage Assets" button at the top right of the screen to view and manage your registered ArNS names.
Next Steps
Manage ArNS Names
Learn how to update records and configure your ArNS names.
Register Programmatically
Use the ar.io SDK to programmatically register ArNS names.
Primary Names
Set up web3 identity with primary names.
How is this guide?